The Great Global Chip Shortage showing no signs of ending.
Manufacturers expect it to extend to 2023, which means anticipating a recovery in 2024-2025 is optimistic at best.
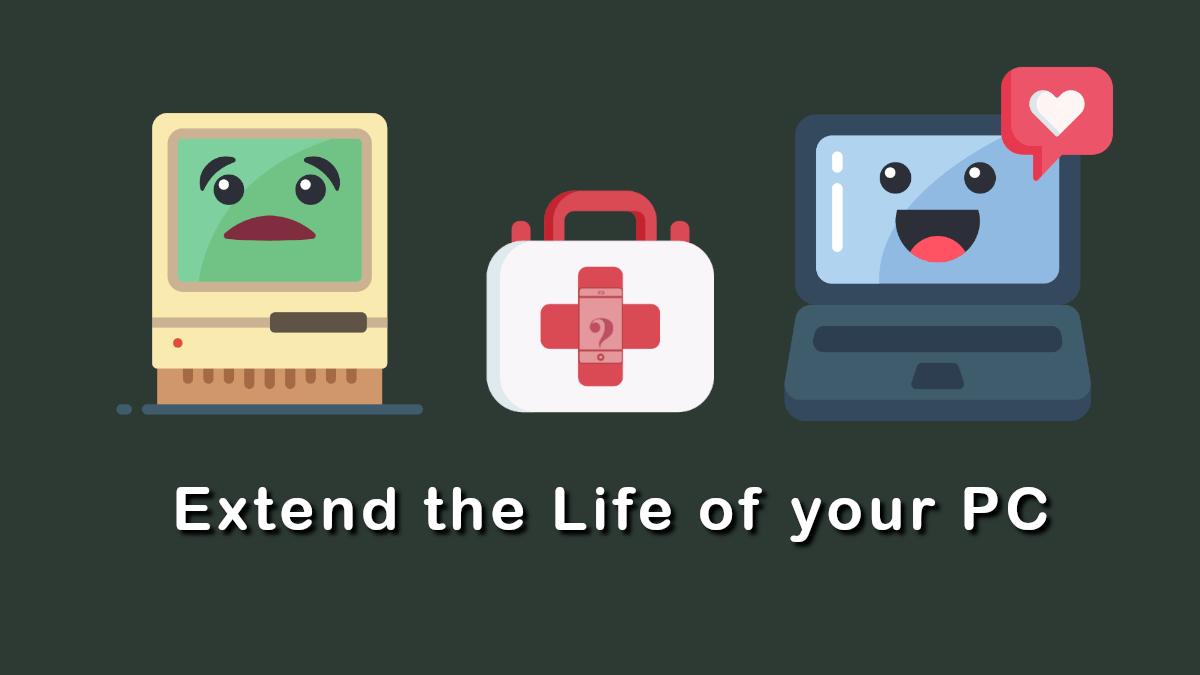
So what can we do to extend the life of our computers in the meantime?
This guide covers basic maintenance steps to improve performance for your PC. This article is divided into two sections: body (hardware) and mind (software).
- Computer Placement
- Clean Fans & Air Vents
- Deep Cleaning
- Battery
- Updating Windows & Device Drivers
- UserBenchmark
- Scheduled Defragmentation
- Startup Programs
- Unneeded Software (Bloatware)
- Actually Shutting Down
- Downloading more RAM
Body (Hardware)
1. Computer Placement
The two most important factors are: 1) Ventilation/airflow and 2) Avoiding dust and dirt particles. Poor placement leads to poor airflow and results in overheating, shortening the lifespan of your machine.
The best place for a desktop or laptop is on a clean table. Ideally kept free of food and drink – and cleaned regularly enough to keep it dust free. Alternatively desktop towers can also be on wheels or housed in an under desk mount.

The worst place to put a desktop is often the floor. Air flow is worse at ground level (especially under a desk). Dust also collects faster on the floor, and moves around more too – unfortunately, straight into your vents.
Desktop cases come in all shapes and sizes; most air is most commonly filtered through the back panel. If nothing else, make sure the back has enough clearance for warm air to dissipate (and not collect heat in say, the corner of a room).
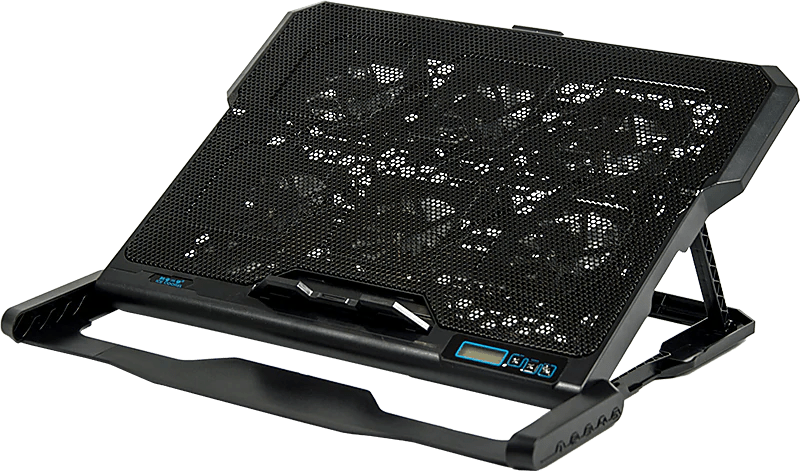
If your laptop has been running warm, it’s worth looking into a laptop cooler stand. A laptop stand not only improves ergonomics (adjustable height) but may also include a USB hub.
With global warming worsening, it’s logical to expect more heating issues as we experience extremities of weather and temperature.
2. Clean Fans & Air Vents
See: Lifewire’s very detailed guide on cleaning a laptop fan
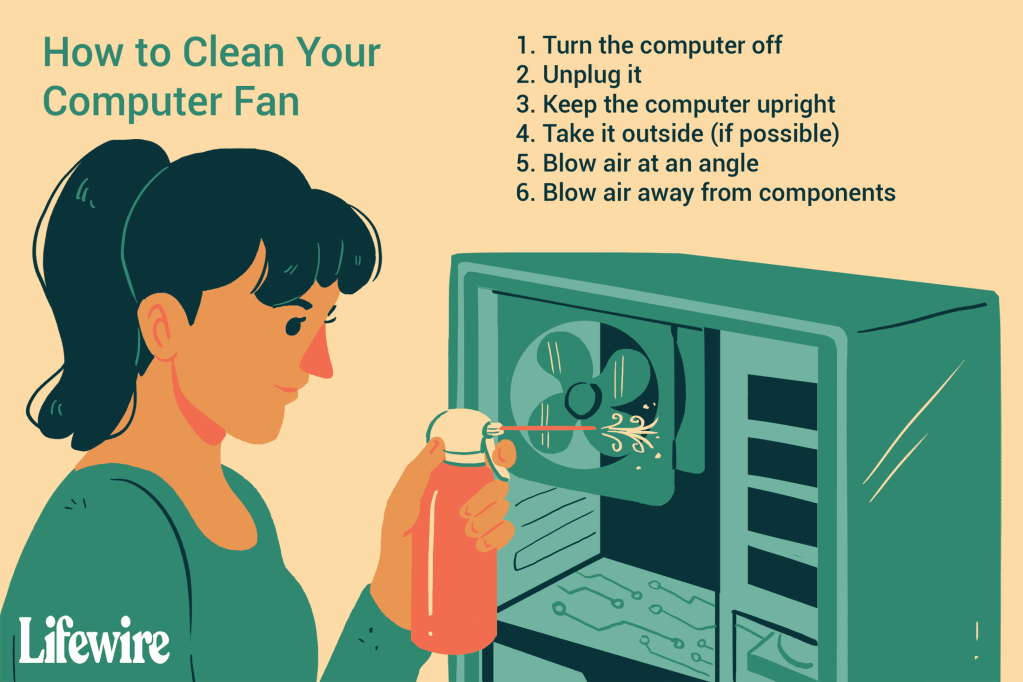
I’ve always used compressed air and cloth towels together (ol’ reliable). To do this properly and clean the fans, you’ll need to open up your computer.
This is more of a headache for laptops users. In many cases, opening the back panel will void manufacturer warranty (less-than-legal-workaround).
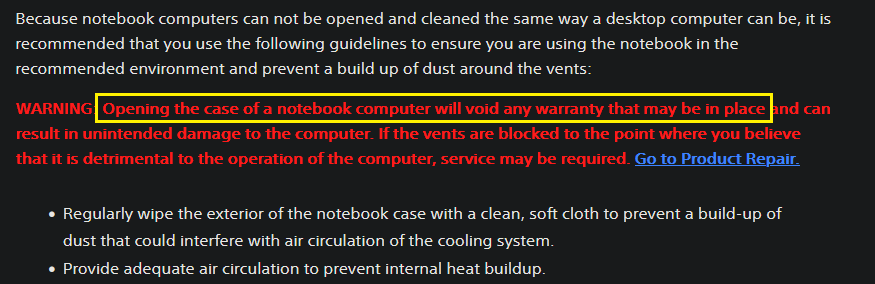
It’s important to note this isn’t always the case – your laptop might even have a self-repair guide. Removing the back panel can seem more trouble than it actually is; but if it’s past warranty I strongly recommend at least having a look inside.
For desktop users, it’s more straightforward. Side panels are removed with ease, fans are easier to take out for cleaning (without needing to be unplugged). Desktop fans sizes are more standardised (120mm) and easily replaceable.
3. Deep Cleaning
This is actually my favourite part, as it can be very, very satisfying.
Grab yourself a trusty can of compressed air. Spray wherever dust has settled; do this at a 5-10cm distance and not at point blank. Compressed air is the recommended way to clean computers (and basically all electronics).

Just make sure you can place your computer at different angles to ensure the dust is actually blown out of the computer and not further into crevices. Do yourself a favour and clean it outdoors.
(A handheld vacuum could work – but poses more risk if brushes make direct contact with circuits or components)
You likely won’t have to remove any components for this step – that is, unless you’re cleaning a CPU cooler for the first time in 5 years:
4. Battery
The average laptop battery lasts 2-4 years (~1,000 full charges). Despite decreased mobility in the the last 2 years and the fact that you don’t need a battery to use a laptop, battery lifespan remains an important factor in performance.
You can extend the lifespan of your battery by simply using it less: only using A/C power at home, and removing the battery whenever you’re not using it.

If your current battery is busted and you intend on using the laptop for longer (at least 2 years), I’d recommend picking up a replacement battery sooner rather than later.
I don’t recommend this for laptops made 2018 or earlier, as they’re likely to brick within 2 years.
Mind (Software)
5. Updating Windows & Device Drivers

I’m sure you’re acquainted with Blue-Screen-of-Death’s younger brother, Windows Update. The Automatic Updates setting doesn’t always work; I manually refresh to check for updates every 1-2 weeks.

I’ve noticed that Windows Update may sometimes reset configurations and even device drivers. In my experience this is mostly for devices with associated 3rd-party software: namely GPU and keyboard/mouse.
Make sure you reinstall your AMD Radeon / NVidia software suite and refresh drivers your drivers. Your monitor(s) may not be able to display your preferred resolution until you do. In some rarer instances, I’ve had to reinstall audio drivers too.
6. UserBenchmark
UserBenchmark comes recommended as a quick and convenient system check. It only takes ~2mins to run and will give you quantifiable comparisons for each individual component and a score.
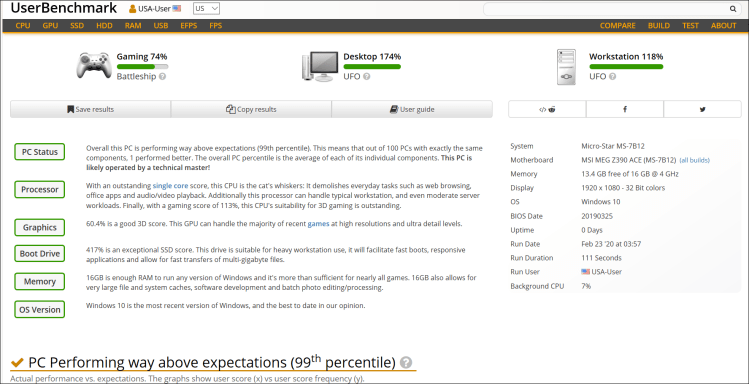
A “PC Status” rating is also given as an overall rating, along with scores in Gaming, Desktop and Workstation categories.
UserBenchmark provides a great overview of system health without needing to install monitoring/benchmarking software for individual components (e.g. CPU-Z, MSI Afterburner or Hard Disk Sentinel).
7. Scheduled Defragmentation*
*Note: Defrag HDDs but not SSDs
Defragging your drives provides a slew of benefits; not least of all faster running apps and extending the life of your drives. Windows’ built-in defragger is free and allows scheduling (automation), often a paid feature for many ‘free’ defraggers available.
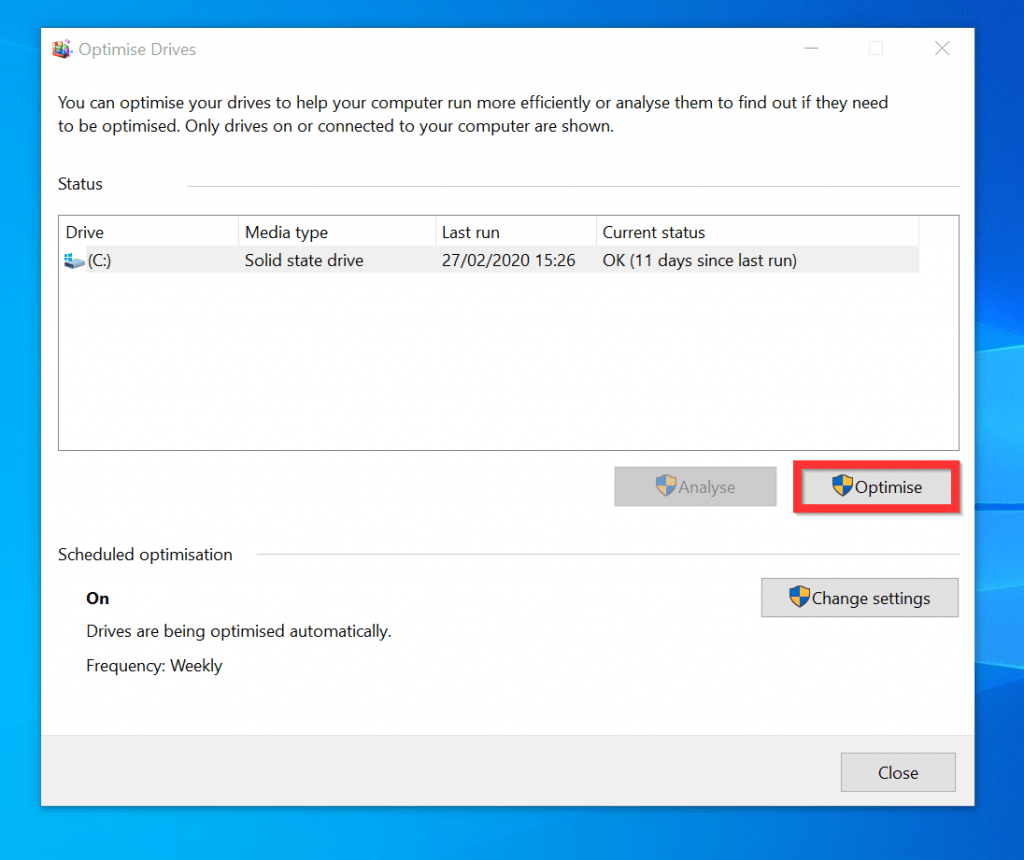
In the search bar, type in ‘defrag’ to locate Defragment and Optimize Drives. Make sure you select Run as Administrator (if applicable). If you’re doing this for the first time, select C: drive, click on the Analyze option and then Optimize. Repeat for other drives.


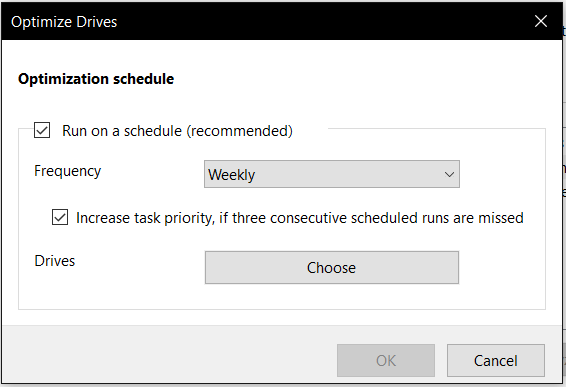
Under Scheduled optimization select Change settings on the right. In the pop-up window, set your preferred frequency to Weekly, and finally make sure all drives are selected.
Note: I’d still recommend checking every few weeks as sometimes it doesn’t automate properly.
8. Startup Programs
When it comes to slow systems, startup programs are the usual suspects. Open Task Manager (by either searching for it, or the Ctrl+Shift+Esc shortcut).
Select Startup (under the 4th tab) for a view of all startup applications.

A good place to start is to sort by Startup impact, targeting those that are high impact – these are the programs taking up the most resources when booting up.
Tip: Reviewing your startup programs every now and then is good for maintaining digital hygiene. Really do go through each individual item to confirm that you recognise its name or function.
9. Unneeded Software (Bloatware)
After checking startup programs, it’s onto bloatware. Loose definition: bloatware is basically software which is no longer as useful but still on your computer.
It’s here that TreeSize comes very handy. A flexible and fast folder scanner that has customisable views (treemap and 3D charts), TreeSize will display the “true” size taken by each application (unlike Windows).

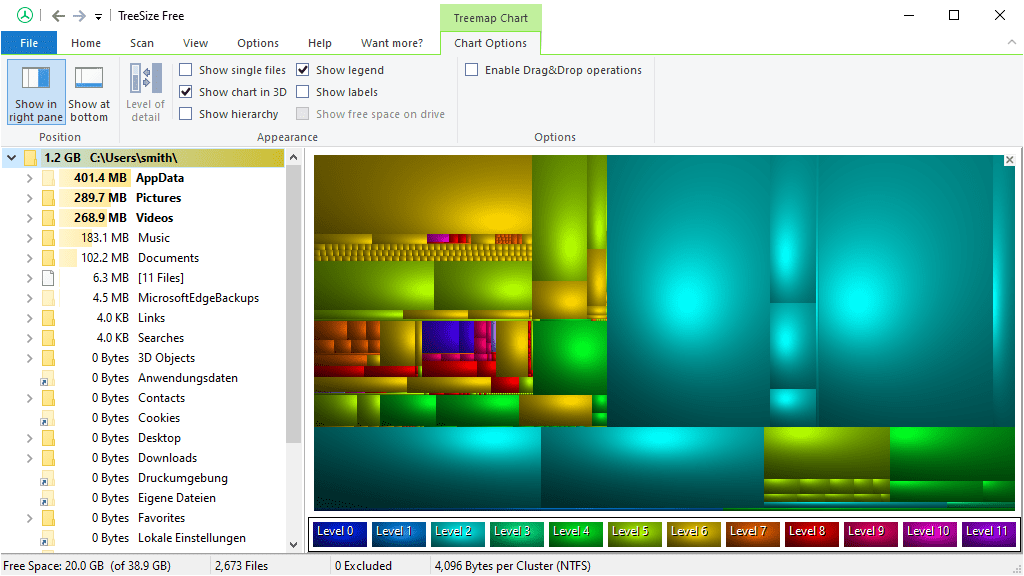

Default folder locations: “C:\Program Files” and possibly “C:\Program Files (x86)“.
This method will also help locate residual files from programs you that you’d uninstalled.
I’ve used IOBit’s Uninstaller in the past but stopped using their products for reasons (related: My First Affiliate Offer).
My current recommendation for an uninstaller is Bulk Crap Uninstaller which is completely free, open-source(!), portable (no installation needed) and without ads.
10. Actually Shutting Down

Make sure you actually shut down your computer at least once a week. I won’t go into the differences between Sleep and Hibernate (tip: Hibernate is better).
Bottom line: when you shut down, the PC clears cache from your session (application cache & temp files).
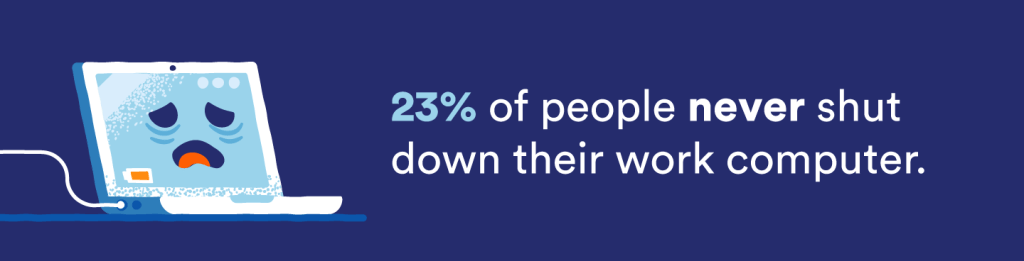
It also clears the RAM (related: next section) as well as enable updates (slated to install upon reboot) to actually initialise.
As you might have guessed, this is also key to keeping your computer secure. Imagine 2-3 months of no Windows Updates – and now imagine the amount of security vulnerabilities you’re now open to (that have actually been patched in the update you have downloaded, but not installed).
11. Downloading more RAM
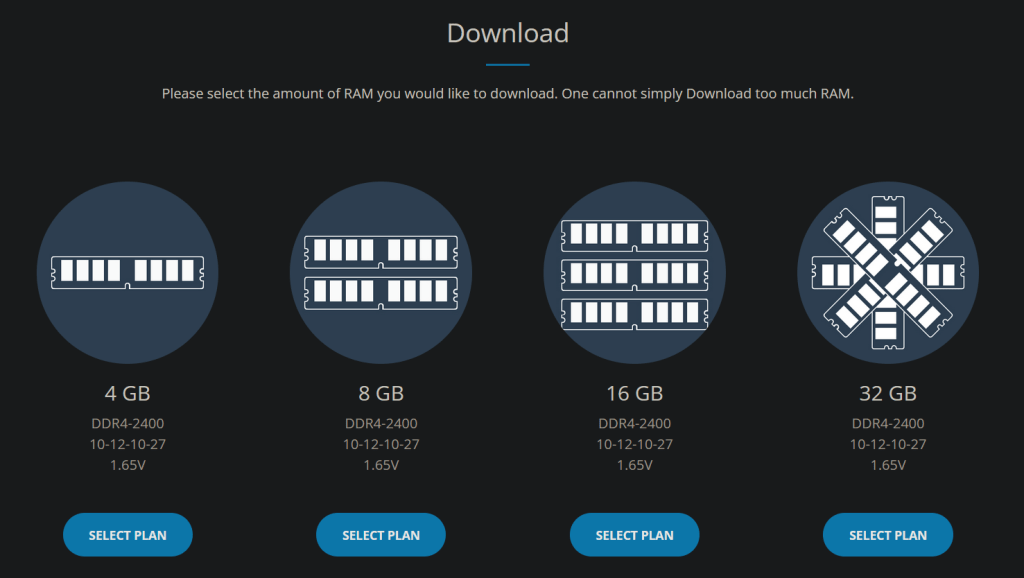
No computer maintenance guide would be complete without addressing RAM. Generally the faster your RAM, the faster the speed of processing.
There’s no downside to more RAM, so why wait for an upgrade when you can download it free of charge?